
Crunchy yet chewy, sweet with a hint of salt—this No-Bake Granola Bars with Nuts and Chocolate Recipe is one of those no-fuss treats that’s perfect for busy days. I remember whipping these up on a weekend, and they vanished faster than I expected. You’ll love how effortlessly delicious and customizable they are.

Jump to:
- Why You'll Love This Recipe
- Ingredients & Why They Work
- Make It Your Way
- Step-by-Step: How I Make No-Bake Granola Bars with Nuts and Chocolate Recipe
- Top Tip
- How to Serve No-Bake Granola Bars with Nuts and Chocolate Recipe
- Make Ahead and Storage
- Frequently Asked Questions:
- Final Thoughts
- No-Bake Granola Bars with Nuts and Chocolate Recipe
Why You'll Love This Recipe
This No-Bake Granola Bars with Nuts and Chocolate Recipe quickly became a staple in my recipe box because it’s a no-mess, hands-on option that tastes like you slaved over the stove. Trust me, you don’t need fancy equipment or hours to get snack-time right.
- Quick & Easy: Takes just about 20 minutes of active prep without any baking required — perfect when you want a homemade snack ASAP.
- Customizable Mix-Ins: You can use your favorite nuts, seeds, chocolate chunks, or dried fruits to make it truly yours.
- Perfect Texture: Chewy but with a nice crunch, thanks to the combination of oats and chopped nuts.
- Great for On-the-Go: These bars pack well for lunchboxes, hikes, or just a quick energy boost between meetings.
Ingredients & Why They Work
Every ingredient has a role to play here. The oats form a hearty base, while nut butter and honey provide that sticky, sweet glue holding everything together. Adding nuts and chocolate makes each bite interesting and satisfying.

- Old-fashioned or quick-cooking oats: They give chewiness and structure; blending the oats slightly makes for a smoother texture if you prefer.
- Ground cinnamon: Adds warmth and subtle spice that brightens the flavor.
- Sea salt: Balances sweetness and enhances all the other flavors.
- Mixed nuts, seeds, chocolate, shredded coconut, dried fruit: The crunch, richness, and occasional bursts of sweetness make every bite delightful.
- Peanut butter or almond butter: Acts as a creamy binder and adds richness; choose your favorite nut butter.
- Honey or maple syrup: Natural sweeteners that also help bind the bars together.
- Vanilla extract: Just a touch lifts the entire flavor profile.
Make It Your Way
I love swapping out the mix-ins depending on what’s in my pantry or the season—it keeps this recipe feeling fresh every time I make it. You should try your favorite combos too; it’s so rewarding to create your signature bar.
- Nut-free Variation: Switch nuts to pepitas and sunflower seeds, and swap peanut butter for sunflower butter. I’ve done this for friends with allergies, and they loved how well it still held together.
- Vegan Version: Use maple syrup instead of honey. It softens the bars just enough while keeping them totally plant-based.
- Extra Fiber Boost: Blend Medjool dates with the sticky ingredients instead of honey for a naturally sweet, chewy bar that’s a favorite morning snack of mine.
- Gluten-Free: Just be sure to grab certified gluten-free oats to keep things safe and tasty.
Step-by-Step: How I Make No-Bake Granola Bars with Nuts and Chocolate Recipe
Step 1: Prep Your Pan and Dry Ingredients
I like to line a 9-inch square pan with parchment paper strips crisscrossed so I can easily lift the finished bars out later — trust me, it makes slicing and storage so much easier. Then mix your oats, cinnamon, and salt in a big bowl. This is where the foundation of flavor begins.
Step 2: Chop or Blitz Your Mix-Ins
Here’s a fun part: I use my food processor to break down the big nuts first, then toss in the rest—pepitas, coconut flakes, chocolate chunks. Pulse a few seconds so everything’s uniform but still nicely textured. No processor? No worries—hand chopping works just fine, I do that when I’m short on time.
Step 3: Combine Wet Ingredients Gently
Pour your nut butter, honey, and vanilla into a measuring cup and stir it up. If your nut butter is stiff, give it a quick warm-up in the microwave or on the stovetop, but don’t get it hot! A lukewarm mixture blends best without melting that chocolate in the mix-ins.
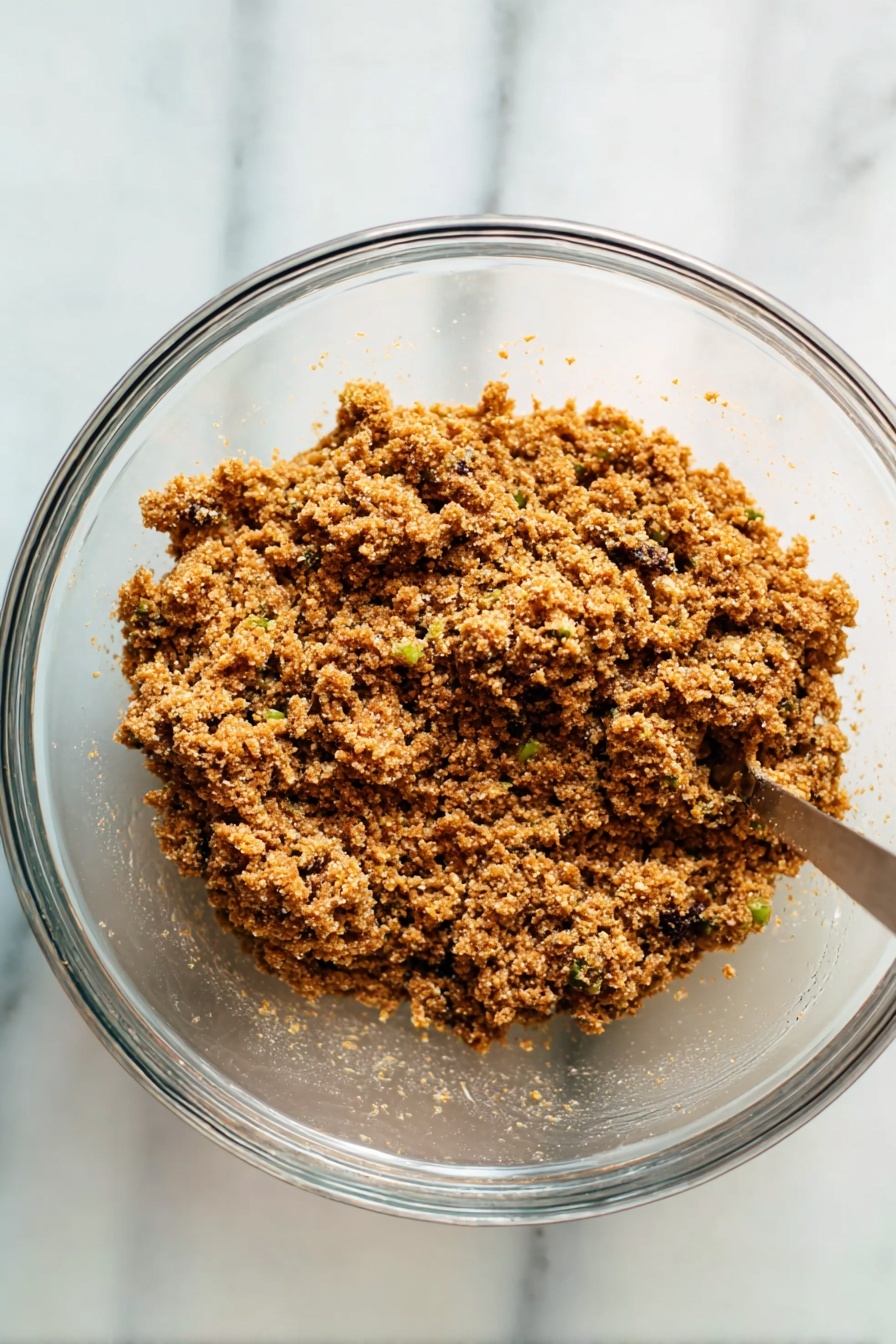
Step 4: Mix Everything Together
Pour the wet mix into your dry oats and nuts, then get ready for a bit of a workout! Stir with a big spoon until everything’s evenly coated and no dry spots remain. If it feels too loose, just sprinkle a few more oats in until it holds together nicely—but don’t overdo it or it’ll get too dry.
Step 5: Press and Chill
Transfer your mixture to the lined pan. Using the bottom of a glass or flat measuring cup, press everything down firmly and evenly. This step really helps your bars hold together and slice cleanly later. Pop it in the fridge for at least an hour, though overnight is my personal favorite for the best texture.
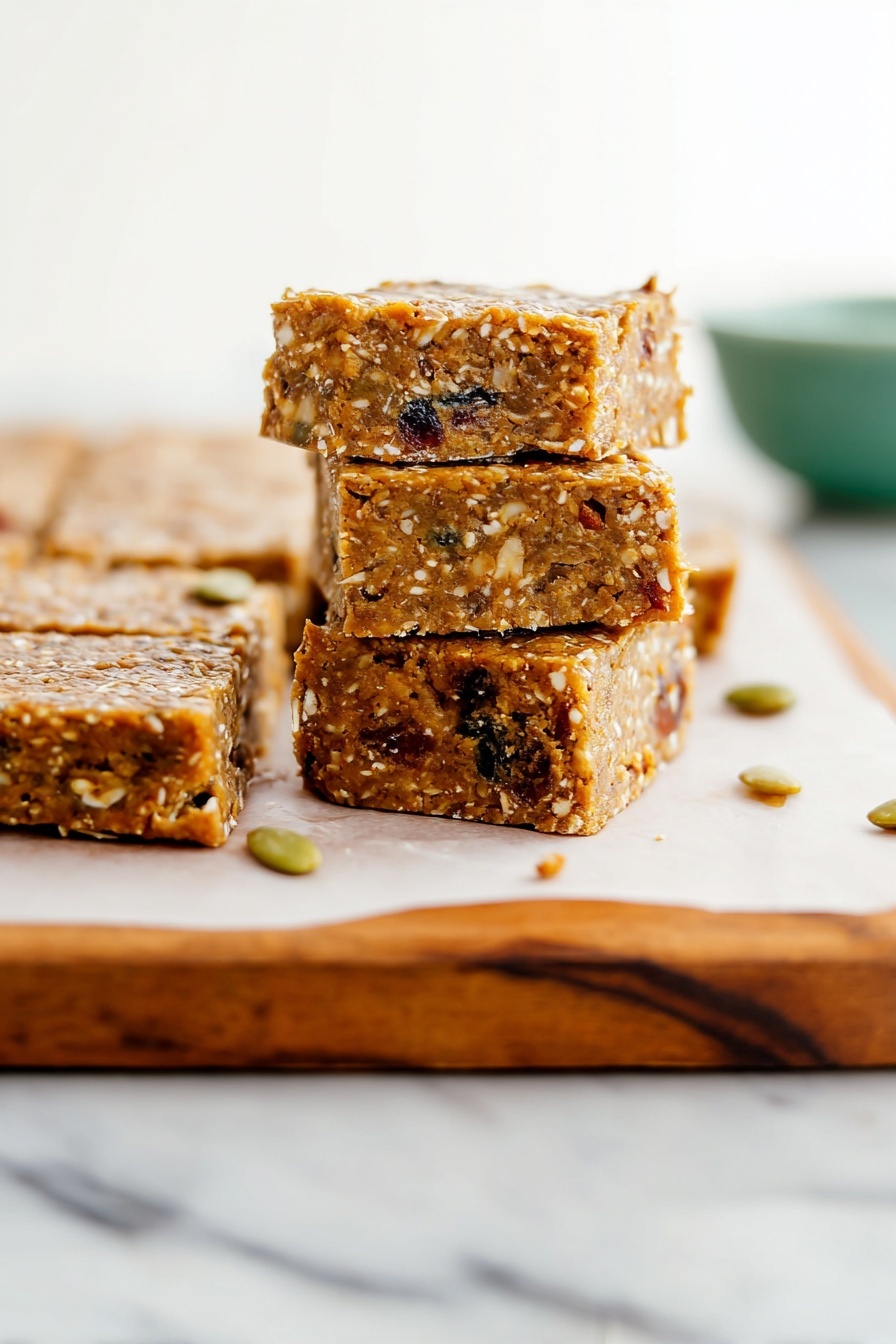
Step 6: Slice and Store
Thanks to that parchment paper lining, lifting the whole block out is a breeze. Use a sharp knife to slice into 16 bars (4 rows by 4 columns). I usually wrap each bar individually or place parchment sheets between them to prevent sticking. These bars stay good for days at room temp but even longer in the fridge or freezer.
Top Tip
After making these bars countless times, I’ve picked up a few small tweaks that really boost your success rate and taste.
- Mix-Ins Size Matters: Chop or pulse your nuts and chocolate until the pieces are smaller than your pinky nail to avoid big chunks that make the bars hard to bind.
- Warming Nut Butter: If your nut butter is cold or stiff, warming it slightly helps everything mix smoothly without overheating and melting the chocolate.
- Press Firmly: Using the bottom of a flat glass to compress the mixture evenly is a game-changer for neat bars that hold their shape.
- Chill Time: Don’t skip the refrigeration - it firms up the bars and makes slicing easier without them crumbling.
How to Serve No-Bake Granola Bars with Nuts and Chocolate Recipe
Garnishes
I usually top bars with a sprinkle of flaky sea salt before chilling for that extra pop of flavor, but when serving, a drizzle of melted dark chocolate or a few whole nuts on top adds a lovely finishing touch. Sometimes I even toss in some edible gold dust for a fun party treat!
Side Dishes
Pair these bars with a fresh fruit salad or a creamy yogurt for a balanced snack or quick breakfast. They’re also fantastic alongside a steaming cup of tea or coffee if you want a crunchy companion to your drink.
Creative Ways to Present
For holiday gift-giving, I slice the bars thinner, wrap them individually in parchment, and tie with colorful twine. At parties, I arrange them on a wooden board with bowls of extra chocolate chips, nuts, and fruits for a DIY granola bar station—guests love it!
Make Ahead and Storage
Storing Leftovers
These bars store beautifully. I keep mine wrapped individually in an airtight container—at room temperature, they last several days nicely. If your kitchen gets hot, the fridge is a reliable alternative that also extends freshness.
Freezing
Freezing is my go-to for saving extra bars. I wrap each one in parchment and place them in a freezer bag; they keep great for up to three months. When I want one, I just thaw it on the counter for 15 minutes before enjoying.
Reheating
I usually don’t reheat these bars since they’re tasty cold and hold their texture best that way. But if you like them softer, a few seconds in the microwave (about 10-15 seconds) works—just don’t overdo it, or they get too gooey.
Frequently Asked Questions:
Yes, quick-cooking oats can be used and will create a softer, less chewy bar. If you prefer a smoother texture, quick oats are a good option.
The key is pressing the mixture firmly into the pan and giving the bars enough chill time to set. Using enough sticky ingredients like nut butter and honey also helps bind everything together. If the mixture is too loose, add a bit more oats.
Absolutely! Simply replace honey with maple syrup and ensure your nut butter doesn’t contain any animal products. The bars will still be just as delicious and chewy.
At room temperature, they keep well for about 4-5 days. Refrigerated, they can last up to two weeks. For longer storage, freeze the bars in an airtight container for up to three months.
Final Thoughts
This No-Bake Granola Bars with Nuts and Chocolate Recipe holds a special place on my kitchen counter and in my snack rotation. It’s friendly for all skill levels and forgiving enough to make your own. I hope you’ll enjoy the process and, most importantly, savor every bite of these homemade bars—just like I do whenever I pull one out for an afternoon pick-me-up.
Print
No-Bake Granola Bars with Nuts and Chocolate Recipe
- Prep Time: 20 minutes
- Cook Time: 0 minutes
- Total Time: 1 hour 20 minutes
- Yield: 16 bars
- Category: Snack
- Method: No-Cook
- Cuisine: American
- Diet: Vegetarian
Description
This easy no-bake granola bars recipe combines wholesome oats, a mix of nuts and seeds, and a honey or maple syrup binder for a healthy, portable snack. With customizable mix-ins and simple preparation, these bars are perfect for breakfast or an on-the-go treat without any baking required.
Ingredients
Dry Ingredients
- 1 ¾ cups old-fashioned oats or quick-cooking oats
- 1 teaspoon ground cinnamon
- ½ teaspoon fine sea salt
- 2 cups mix-ins (nuts, seeds, chocolate, shredded coconut, or dried fruit)
Wet Ingredients
- 1 cup creamy peanut butter or almond butter
- ½ cup honey or maple syrup
- 1 teaspoon vanilla extract
Instructions
- Prepare the Baker: Line a 9-inch square baking pan with two strips of criss-crossed parchment paper, fitting them neatly against the base and sides to make removing and slicing the bars easier later.
- Mix Dry Ingredients: Place the oats in a large mixing bowl. Add the ground cinnamon and salt, stirring to combine evenly. Set aside.
- Process Mix-ins: Briefly blitz the nuts, seeds, chocolate, and dried fruit in a food processor or blender until pieces are smaller than your pinky nail. If no processor, chop by hand. Add these to the oat mixture.
- Combine Wet Ingredients: In a 2-cup liquid measuring cup, measure the nut butter. Add the honey and vanilla extract, stirring to blend fully. Optionally warm gently on stovetop or microwave to aid mixing but cool to room temperature before use.
- Combine Mixtures: Pour the wet mixture into the dry ingredients. Stir vigorously with a large spoon until thoroughly combined and no dry oats remain. If mixture is too loose, add more oats gradually until mixture holds together well.
- Press into Pan: Transfer the mixture to the prepared pan. Use the back of a spoon or a flat, round object like a glass bottom to firmly and evenly press the mixture into an even layer.
- Chill: Cover the pan and refrigerate for at least one hour or preferably overnight to allow the oats to absorb moisture and the bars to firm up.
- Slice and Store: Lift the bars out using the parchment paper edges. Cut into 4 rows and 4 columns for 16 bars. Wrap individually in plastic wrap or parchment paper to prevent sticking. Store bars at room temperature for a few days, refrigerated for a couple of weeks, or freeze for months for best flavor.
Notes
- Mix-in options include any combination of nuts like almonds, pecans, walnuts; seeds such as pepitas or sunflower seeds; chocolate chips or chopped chocolate; shredded coconut; and dried cranberries or cherries. Large pieces should be chopped smaller than a pinky nail.
- For a smoother, less chewy texture, briefly pulse old-fashioned oats in a food processor before mixing.
- To sweeten mostly with dates and increase fiber, soak 12 Medjool dates in hot water for 10 minutes, pit and break in half, then blend with 2 tablespoons maple syrup or honey until smooth.
- Use certified gluten-free oats to make this recipe gluten free.
- To make nut-free bars, omit nuts, use seeds like pepitas and sunflower seeds, and replace nut butter with sunflower seed butter.
- For a vegan version, substitute maple syrup for honey.
Nutrition
- Serving Size: 1 bar
- Calories: 180 kcal
- Sugar: 10 g
- Sodium: 80 mg
- Fat: 10 g
- Saturated Fat: 2 g
- Unsaturated Fat: 7 g
- Trans Fat: 0 g
- Carbohydrates: 20 g
- Fiber: 3 g
- Protein: 5 g
- Cholesterol: 0 mg

Leave a Reply